
Ever since discovering the art of calligraphy as a useful and immensely satisfying (and a little bit costly) hobby, I’ve always wanted to do a handwritten correspondence with someone who lives in another country. In short, a penpal. Although I have been wary of looking for penpals off the internet because, well, it’s the internet and you never know if you’re writing to a potential stalker or a creepster or a predator. I have a short anecdote that I will share in a separate post about how I learned to be paranoid about strangers over the internet. But that’s a story for another day.
Back on topic. Following the calligraphy tag on tumblr had me looking at skilled calligraphers who correspond with their calligrapher friends with their fancy cursive and flowing scripts and pretty flourishes and parchments and wax seal stamps, and of course the one thought that ran through my mind was: “Ooh, that looks fun… I want one.”
The wax seal stamp, I mean. The pretty cursives and flowery flourishes takes years of practice that both frustrates me and makes me determined. The penpal position is still open because I’m wary of creepsters. But parchment and the stamp are pretty attainable. So, I want one.
Problem was, customized wax seal stamps are really freaking expensive. And knowing that I have no use for it because I don’t have anyone to write a letter to, I gave up the idea of buying one.
But I didn’t give up the idea of having one. So naturally, I scoured the internet for do-it-yourself wax stamp seals, and I particularly liked this shank button wax seal stamp and this one made from rubber carving block. There was another really cool set of instructions from RageHaus that used wooden dowels and wood burning tools, but unfortunately, the website is not available anymore.
I haven’t done any of these, because I don’t own any wooden dowels, wood blocks, wood cutting tools, shank buttons or any abandoned chess sets lying around. But then I remembered that I grabbed a pack of bakeable clay on a whim (someone should definitely keep me away from Hobby Lobby because I could buy the whole store), and got the idea to create my own.
It took about four hours of labor (that might be because I work at the speed of a baby turtle), but the finished product, which I dub my trial stamps, came out decently:
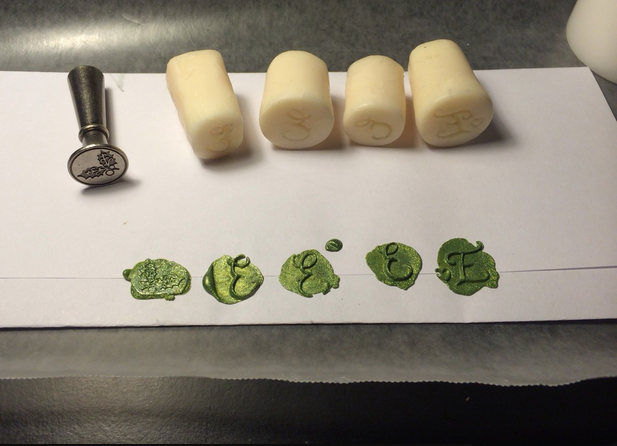
Clearly I need to improve my wax seal application…
I had fun making these, so I thought I’d share.
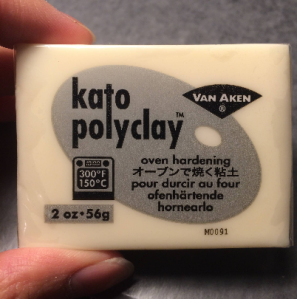
Kato Polyclay
What you’ll need:
-Kato polyclay, or any kind of polymer clay that you prefer. This one that I randomly grabbed worked out perfectly.
-Wax paper. Or a plastic bag. Something that you can use to cover your working table with because the clay will be greasy when you start to knead it.
-Pencil
-An inkless pen. Or anything pointy. A toothpick would work, but make sure to smooth out the end.
-An oven. This is quite essential as you’re going to have to bake the polyclay if you don’t want a limp, useless wax seal stamp.
-Baking pan
-Paper
-Wax seals. So you’ll have something to test your wax seal stamp with.
-A candle. Or a lighter. Or a match. Anything save a stove that produces fire.
Instructions:
1) Pinch off an appropriate or desired amount of the clay that you think you’re going to need for your stamp. Or heck, just use as much as you want.

This is approximately 1 ounce of the polyclay.
2) The clay is going to be firm, so you have to knead it. Knead it like you intend to give it the best massage of its life. Doesn’t matter if your technique could be likened to a bull dancing the cha-cha on top of a person. That firm, unyielding clay would soon be like putty in your hands.

Not putty yet, but getting there.
3) Roll the clay into a cylinder. Or shape it into an elongated cube. Or a polyhedron, if you’re feeling that creative. Just as long as the “face” of the stamp remains flat, shape the “handle” into a kick-ass lightning bolt, if you have the patience. Just make sure you don’t make the “face” too wide.

I shaped mine into a Rook in order to have two “faces” in one stamp. This is intentional. No, I didn’t choose this shape because I tried and thoroughly failed to shape a human head and instead ended up with a weirdly-shaped blob. What are you talking about?

…Okay, fine. I don’t know, okay? It was supposed to be a head, I swear, but it ended up like this. Rooks are much easier to shape.
4) Pencil out a design for your stamp face. Make sure that the design will fit within the stamp face.

For the 1st face, I chose “W” for Winchester. Why? Because Supernatural, that’s why.
*Tip 1: One way to do this would be placing your stamp on a paper and tracing the edges to determine the boundaries.

Please ignore the fact that this isn’t the same clay.
*Tip 2: If you want something more complicated than a simple monogram (for example, a lamp, or a human transmutation circle, idk), copy it from the internet, paste to MS Word, resize if it’s too large, and print it off. BUT don’t be a douche and claim the design as your own.

I chose the anti-possession tattoo symbol from Supernatural for my 2nd stamp face. I printed this off after three failed attempts on drawing it on paper.

When I finish this, I’ll have a wax seal stamp that will ward off possession on anything that I stamp it on. Letters that you don’t want altered? Slap on an anti-possession symbol and see if Crowley comes near it! Mwahaha!
5) Darken your design with your pencil. Like, really darken it. Trace your design with enough pressure that when you put your face on top of it, it will leave an imprint. The darker, the better.

It looks easy enough, right? Wrong.
6) Take your clay stamp and place it on top of your design. Turn the whole thing upside down, with the paper now on top, and scratch it to make sure that the clay takes up the pencil imprint.

Slap the pattern onto the “face,” and then lightly scratch the surface.

You barely see it from the photo, but the imprint is there.

Here’s the “W” for my 1st stamp face.
7) Take your pointy tool (a pen, a toothpick, or anything that you can try and poke somebody with and they respond with “ow!”) and start carving your stamp face. The image will naturally be reversed. Try not to make it too shallow that it won’t show on the wax seal when you try it out, or too deep that the wax may break off inside.

My pointy tool is my mechanical pencil. It works out wonderfully.

Carving this took about two hours in total and I was ready to puke by the end of it.
8) When you’re done carving your clay, smoothen out the edges, wipe out fingerprints, make sure the rest of your stamp face is relatively flat.

I sliced off the edge in order to get rid of the unintended outer circle. So now it really looks like a chess piece.

Save yourself the trouble and just carve out monograms. This only took me fifteen minutes.
9) Preheat the oven. Place a wax paper on top of the baking pan, put the stamp clays face down. According to the Kato polyclay directions, it must be baked for 10 minutes in 300 degree Celsius. If you have another brand of polymer clay, then follow its specific directions.

*CAUTION: Be careful in taking the pan out of the oven. I know it sounds noble, but “suffering for your art” doesn’t mean suffering 2nd degree burns because you got so excited that you grabbed the stuff straight from the oven.
11) Let the clay cool off and make sure you’ve baked the malleability out of it.
12) Voila! Your stamp is ready to be tested!

Here goes nothing!
To test your stamp:
1) Grab a piece of paper, melt the wax seal onto it.
2) Immediately stamp your…er, stamp onto the wax seal, hold still for a few seconds, and then carefully lift up your stamp.

Okay, let me try that again.

Took a couple of tries, but hey, it works!

Seriously, just do monograms. They’re a whole lot easier to do.
Is it successful? Alright, time to color!

Bam! Rook = Impala because chess rooks are powerful towards end games and the Impala turned out to be the most important thing in the universe.

S.W. and D.W. on the side. I’m so clever I didn’t even know it. *preens*

The Winchester Family Motto
WHAM! Have a letter that you don’t want demons to get a hold of? Slap an anti-possession symbol on it.
I like to think The Men of Letters have a variation of this somewhere in the bunker that Sam has yet to find.
Of course, I made this before season 9 finale aired, so sorry Dean. Guess you won’t be sending anyone any letters any time soon.
Or opening any letters. Sam can totally start a diary now.
…
…
Okay, I’m done.
If you ended up with an unrecognizable blob of clay, I apologize profusely for wasting your time.
***
[ETA: I posted this months ago in my Tumblr. It was still sitting in my drafts here for some reason. Eh, posting it now.]

